

Tuesday, 30 November 2010
Fire and ice
Sunday, 28 November 2010
Quilled birthday card for a centenarian!
Next weekend, my aunt will be 100 years old! I'll be going to a special family party in a couple of weeks' time, but wanted to send her card in time for the actual birthday - and here it is:

 When I was on holiday in the Isles of Scilly in October, I took this photo of some fabulous pink hydrangeas (left), and have been waiting for an opportunity to use it. Well, today I decided that the time had come!
As I usually do with my photo background cards, I first pulled the photo into a bordered shape - an oval in this case - and matched the colour of the typography to the lovely sage green that appears in some of the hydrangea petals. Because it's quite a 'busy' picture and I didn't want this to distract from the quilling, I also reduced the opacity of the photo to 80% before printing the card.
The quilled flowers on the card are made by joining three strips in different shades of pink and 'flat rolling' them in Art Deco style. The filigree work between them is in dark green, but I'm afraid that colour doesn't show up too well in my photo (blame the dim afternoon light of an English winter!). I thought using blue in the butterfly's wings would make a good contrast to the pink flowers, but I've still kept a little bit of pink in the centre of the coils just to tie it all together.

Saturday, 27 November 2010
Quilled silver star earrings for Christmas

I have a regular customer at the market who is always asking me to design new quilled earrings for her. (She's the lady who recently bought the poinsettia earrings, and she also regularly wears some little black and white sheep earrings that I made - you may remember me mentioning her before.)
Anyway, her latest commission was for a pair of silver star earrings to wear at Christmas. She wanted me to try and make them by layering two groups of three 'star points', a bit like I did with the poinsettia petals.
Well, I started off just using silver strips to make the groups of three teardrop-shaped star points - but, to be honest, they looked a little dull. So then I decided to coil the silver strips with white strips to give a two-tone effect, and this definitely brightened them up. Having layered the star points in an offset fashion, I finished the design by adding a little stick-on 'jewel' in the centre.
I'm one of those 'purists' who really doesn't like to use a quilling tool because of the kink it leaves in the centre of a coil. I wind my strips around a needle tool instead. But I must admit, I do find winding metallic strips difficult - somehow they just don't seem to want to start rolling, even after dampening the ends. So, for the coils I used in these earrings, I actually attached the silver strips to the white strips about 5mm down from the ends of the white. This had two benefits: first, it was much easier to get the coil started by winding the first part of the white on its own - and second, the resulting coils had a nice focal point of white in their centres. I would recommend this technique to anyone who shares my difficulty with rolling metallics. Just don't forget to wind the joined strips with the metallic on the outside to get the right colour effect!
Wednesday, 24 November 2010
Another quilling challenge
Followers of Quilliance know that when it comes to quilling, I love a challenge! And on the subject of challenges, I've got news on two fronts:
Firstly, I'm very pleased to say that my snowflake card has been included among the winners in November's Take A Quill Pill challenge, and I feel highly honoured to take my place in Piyu's 'Hall Of Fame'.
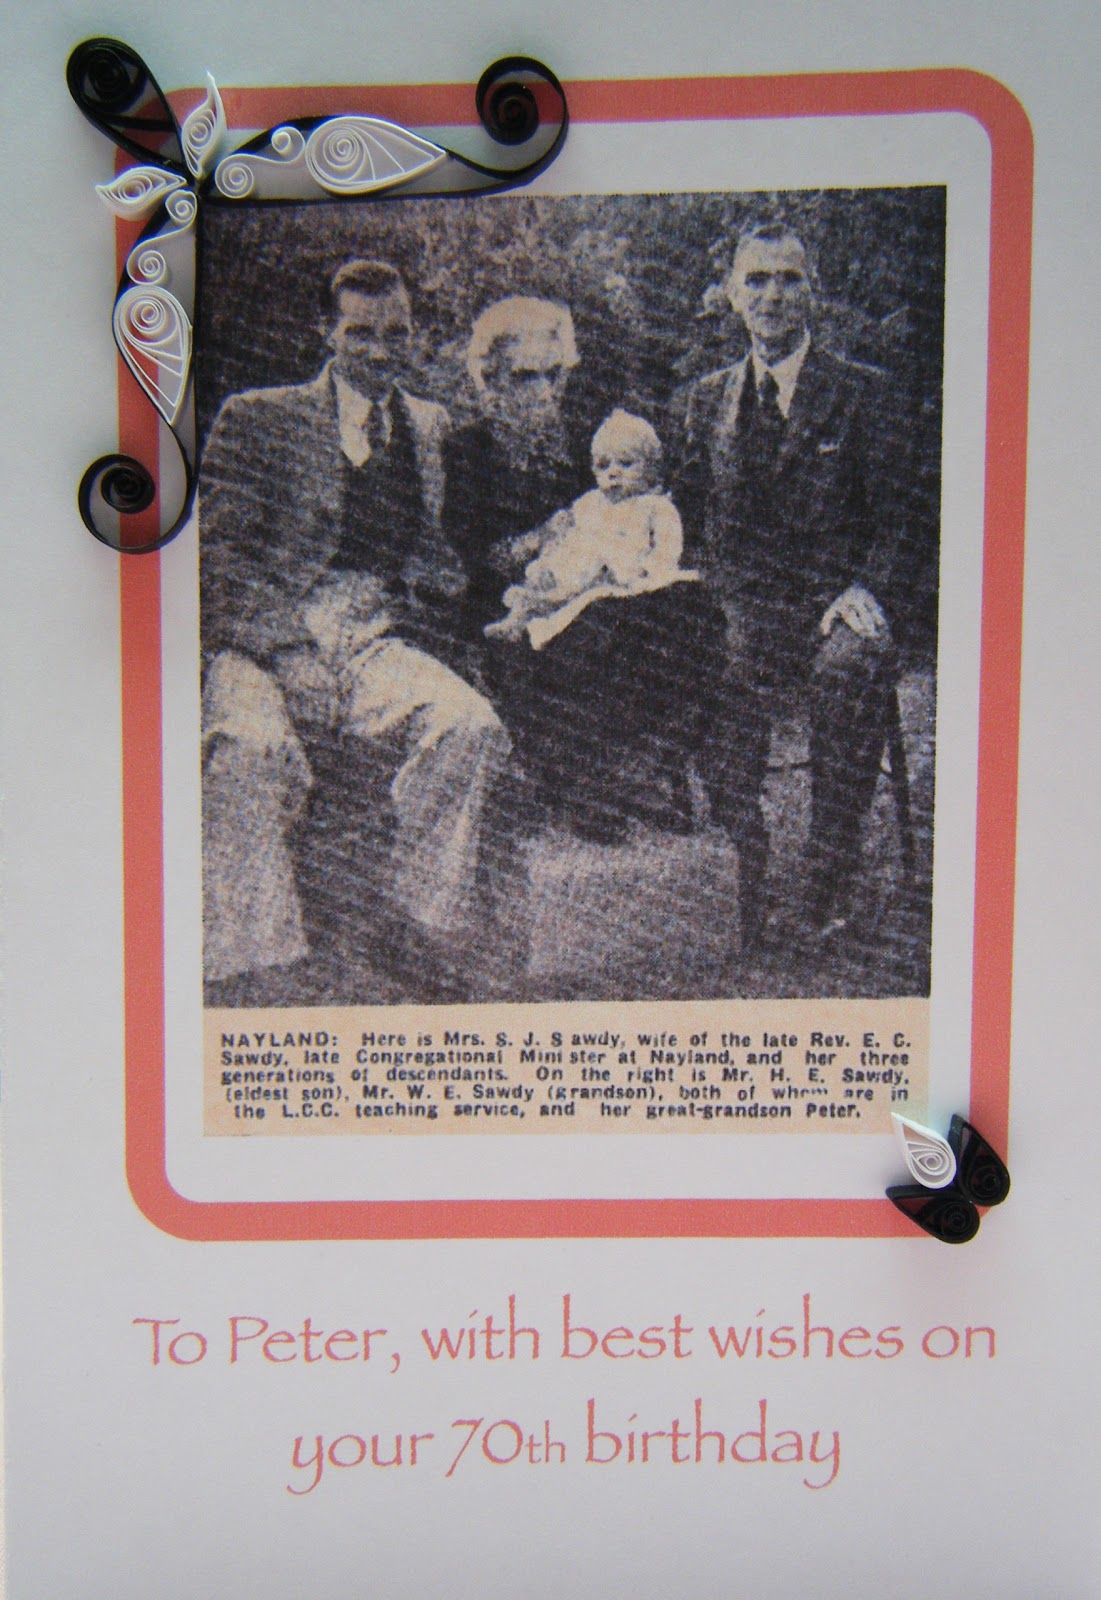
Secondly, I was given an interesting challenge by a customer this week: to design a card around an old press cutting which included a photograph of the intended recipient (male) as a baby. As we all know, cards for men are always harder to design when it comes to quilling, and in this instance my customer wanted some filigree work in black and white to complement the old photograph. I decided to introduce just a little bit of red in the picture outline to provide some colour, and then kept my quilling simple as part of the picture 'frame'. Here's the end result, and I'm pleased to say that my customer was delighted.

Firstly, I'm very pleased to say that my snowflake card has been included among the winners in November's Take A Quill Pill challenge, and I feel highly honoured to take my place in Piyu's 'Hall Of Fame'.
Secondly, I was given an interesting challenge by a customer this week: to design a card around an old press cutting which included a photograph of the intended recipient (male) as a baby. As we all know, cards for men are always harder to design when it comes to quilling, and in this instance my customer wanted some filigree work in black and white to complement the old photograph. I decided to introduce just a little bit of red in the picture outline to provide some colour, and then kept my quilling simple as part of the picture 'frame'. Here's the end result, and I'm pleased to say that my customer was delighted.
Sunday, 21 November 2010
Talking turkey with some quilled Christmas greenery

Even though we don't celebrate Thanksgiving on this side of the Atlantic, the turkey image is still just right for an English Christmas card. All it needed was a flourish of quilled Christmas greenery and berries ... and this is the result:

Friday, 19 November 2010
I'm taking my second Quill Pill!


Thursday, 18 November 2010
Quilled festive napkin rings

I make these rings from strips of rolled and glued glitter paper, with a different quilled motif on each. They have proved very popular over the years - this is the third Christmas season that I've been asked to make them. Practice makes perfect ... and I'm rather pleased with my latest holly leaves made from two different shades of green. This mistletoe sprig is a new motif for this year, too.
Sunday, 14 November 2010
A new quilling idea takes flight

Like the holly leaf in my earlier post, I made the main wings out of two simple open teardrop shapes (made using crimped strips). To create the 'pinstripe' infill effect, I glued down some short lengths of leftover strips in parallel on a piece of card, and then cut out two sections that would fit within the teardrops with the help of a cardboard template.
When assembling the butterfly, I stuck the body down first, and then put the wing infills in position using sticky pads to raise them up a little bit above the surface of the card. Next, I put the crimped teardrops around them. I think raising up the infills on the pads makes them look better connected to the wing outlines than if I had glued them directly to the card. Finally, I added the the lower wings made from two conventional teardrop coils.

Saturday, 13 November 2010
Artist of the month!

I had some exciting news today - I've been featured as 'Artist of the Month' on the Giddy Greetings Quilling Cards and Craft site. AND my woven paper purses have appeared on the excellent Going Green Crafters and Artists blog. My thanks go to Monica for conferring these great honours!
Wednesday, 10 November 2010
Experimental Christmas quilling

Today, I decided to create a quilled holly leaf for a Christmas card - but instead of making it with the usual pinched green coil, I started with an open shape as an outline that could then be filled in with other shapes.
As you can see, I'm on a bit of a crimping kick at the moment - I think that shapes made out of crimped strips definitely have an extra bit of character when you want to do something different.
So ... not a conventional Christmas card by any means, but hopefully an eye-catching one!
Sunday, 7 November 2010
Extra dimensional quilling - part two
 |
| Original photo background |

When you put the two cards side-by-side, you can see that the background is the same, but the character of each flower is quite different! And, of course, I only had to quill the background once. Has anyone else tried this yet?
 |
| My first card |
|
| The latest card |
Saturday, 6 November 2010
Some little quilled doves of peace


I was quite pleased with the little 'olive branch' appearing next to the rainbow (echoes of Noah and the Great Flood here!), but I felt that the black outline was perhaps just a bit too heavy for this delicate little dove.
So I made another bird without an outline, and this one has gone on to a plain blue window-shaped background - altogether much more of a soft, peace-filled design for Christmas time. I think this is definitely one of those cases where 'less is more' in terms of simplicity. And it reminds me that I don't have to use a photo background every time. Sometimes the quilling just speaks for itself.

Friday, 5 November 2010
Quilling inspired by stained glass windows

My coloured 'glass panes' for the motif on this card were created using crimped strips, loosely rolled into tight coils (if you see what I mean!!) The crimping gives an interesting patterned effect, a bit like the texture of dimpled glass. I've added the 'leading' by outlining each shape with a black strip, wound around three times to make it quite prominent. (I have always loved the effect of bright colours set off against black.)
The photo background for this quilling was created using four images - two sky scenes and two of green leaves - to suggest the beauty of the world beyond the coloured 'panes'. I'm pleased with this one ... hope you like it too!

Thursday, 4 November 2010
A strong argument for quilling

One of the craft producers at our Friday market has been making some desk-top pen blocks. These are made from polished wood with an angled hole into which you can insert a pen. He asked me if I would like to collaborate with him by making some quilled motifs to decorate the blocks of wood. Naturally, I said yes!
The motif shown here is the one I created to decorate the first pen block, like this:

(I've just placed the motif in position here to show you.)
Unfortunately, when I tried to attach the spray-varnished motif to the polished wood with PVA glue, it wouldn't stick! I experimented with other types of Super Glue, but these soaked into the quilling strips, leaving unsightly marks. So then we decided the best way to go was to attach some backing paper to the wood block first, so I could stick the motif to that using PVA. All went well, until I noticed that the paper had started peeling away from the wood block a few days later. Well, to cut a long story short, our experiments with different types of glue are still continuing. BUT - and this is the point I really wanted to share with you - despite all these failures, the quilled motif itself has survived intact!
After the backing paper peeled up, I literally ripped the motif away to try and rescue it. There was nothing gentle about this - I simply tore the paper off the back. And the motif is just fine, apart from one slightly squished white coil on the right hand side!!
So, quilling (once it's varnished) can obviously survive all manner of ill-treatment. I'll never worry about the strength of my quilled jewellery again!
Wednesday, 3 November 2010
Woven paper purses


I really enjoy weaving with magazine pages, because you can have fun matching up a miscellany of patterns and colours - but plain paper weaving can be very effective, too, especially when decorated with a little quilling! Here are some other examples of a decorated clutch bag and folding needle-case which I made some time ago. For the black bag, I was lucky enough to be able to obtain some 'leather-effect' paper which looks quite striking. The needle-case was woven from gold gift wrap which turned out really shiny after putting the varnish on.


Subscribe to:
Posts (Atom)